I recently saw a video about making you card have a design that spins.
That led me to my last card for the Superstar challenge.
I started with a brown card stock base card.
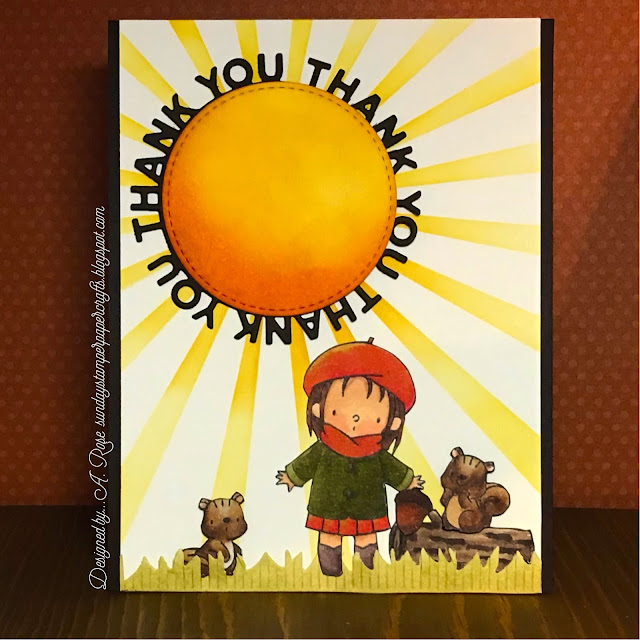
On a piece of cream card stock I stenciled the sun with MFT “Sun Ray” stencil and Distress inks mustard seed, fossilized amber and spiced marmalade and attached t to the base card.
In the center of the sun with Tombow mono liquid glue I glued down a flat button that would fit in the center of the smallest die from MFT Die-namics “Inside & Out Stitched Circle STAX”.
From another piece of cream card stock I die cut a circle using the fourth circle from the center of the same set, then cut the center circle from the set in the middle of the larger circle.
With heavy brown card stick I die cut the sentiment using MFT Die-namics “Thank You Circle Frame” and glued it to the cream circle with the hole in the middle.
With another piece of cream car stock I die cut one of the larger circle and applied the Distress ink colors to make it a sun before gluing it to the button on the base card.
On more cream card stock I applied Distress inks peeled paint and scattered straw before die cutting it first with MFT Die-namics “Mini Fringe” then with the grass die from MFT Die-namics “Pop-Up Wiper Card Components” and glue them to the bottom of the card front.
On yet more cream car stock I stamped the images from the set I have used for all three designs for this challenge MFT Stamps “Fall Friends” using MFT extreme black hybrid ink and coloring them with Copic markers.
These I trimmed out with scissors then glued and foam taped them to the card front.
I am about to show you how it works but keep in mind that I don’t have a great set up for video…
No you don’t see the video because, well I don’t know why!
I tried everything that they suggest to load it and troubleshoot but you will just have to believe me it spins!!!


No comments:
Post a Comment
Thanks for your patience while I moderate the comments!