Wednesday, August 31

Anything goes...

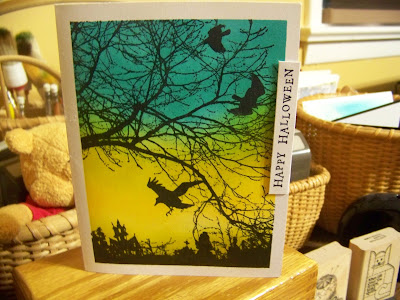
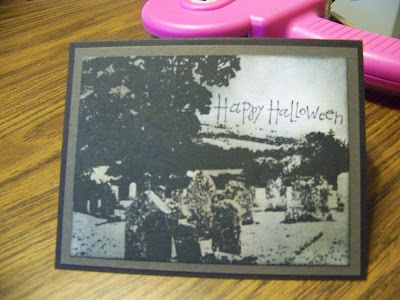
So, of course, mine is Halloween!!!
(Need to count my cards again to see if I'm nearer to 31)

 Simon Says Stamps Challenge...Anything Goes

This was a really fun card to make.
I started with a dark grey base card and added a piece of white card stock that I sponged with Distress ink black soot around the outside edges.
I cut another piece of grey, a bit lighter, card stock and ripped a piece of text weight paper, to use as a template for a spooky sky with Distress ink black soot and a sponge dauber.
In the middle of that card I stamped the Stampendous iron gate with pumpkins, trying hard not to ink up too much of the pumpkins, with Staz-On black.
I used Stamps by Judith grass stamp and the Staz-On black to make it look like dried brush at the bottom of the card.

Now the fun part...
I had purchased these tombstone stickers from Recollections because they showed different faces, skull or fleshy, when you move them.
They fit perfectly and the crow was a bonus sticker with the set.

I just know Stephen will go crazy for this one!!!
He loves cemeteries.
Good thing we live next door to one.

Back to the spooky cards...


Found this wonderful patterned paper in my stash and had to use it for this card.
I layered it onto a black base card, then trimmed a piece of purple card stock to match the kitty eyes.
Luckily from another paper pack I had black glittery paper and used it with my Cuttlebug and Spellbinder "skull and crossbones" die. 
Trimmed the cross bones off the die cut pieces and applied as per the sketch.
Stamped the Happy Halloween in Staz-On black.

Halloween prep continues on a lighter vein...

Most of my posts have been for my youngest son.
But the colors for the Color Throwdown Challenge just didn't work with zombies and voo doo.

I chose to go a little lighter this time...

I bought the vampire and mummy at a used stamp sale so I'm not really sure what company they are but they are very cute and I believe it might be Darice?

The base card is white and the first layer is red card stock.
The top is white card stock that I stamped the vampire and mummy to using black Staz-On ink.
I colored them with colored pencils and made masks for them from post-it notes.
 I also cut a mask from a post it using a circle die, you can choose whatever size you like.
Using an old pair of ragged edge scissors I trimmed a piece of text weight paper.
As in the past I used the top part to mask so I could sponge Distress ink mowed lawn for the grass.
Then I used the bottom of the text weight to mask the grass while I sponged the top with Distress ink salty ocean.
I left the mummy mask on and removed the circle, but using the post-it I cut the circle from, as a mask, I carefully sponged Distress ink fossilized amber for the moon.
Finally I stamped the "Trick or Treat", from Art Gone Wild, on the lower right of the card using black Staz-On.
The top is put on with foam tape to lift it a bit.

I am also adding this to the...

Little Red Wagon is another "new to me" challenge...

You may ask why I search out all these challenges.
Honestly it's to challenge myself to make multiple cards instead of copies of one.

This one will be not surprise people who know me oh so well!


The base card is white card stock that I used painter's tape around the outside to tape the card to the table.
I cut a piece of text weight paper and used it to mask the top while I used my Distress Ink peeled paint to ink the bottom with my Tim Holtz blender tool.
Then using the other half of the text paper I masked the bottom and inked the top with Distress Ink spiced marmalade.

I did the lettering with a fine line marker.

The barista is from MFT stamps.
I stamped her with Adirondack black dye ink and colored her using my new Chameleon markers.
Once she was cut out I put some glue dots on the back to give her some dimension when placing her on the card.

So excited that Thursday I can finally get my Starbucks PSL!

So great to have friends...

A while back I posted the cards from a get together with two friends.
We had a great stamping day and it was a great way to share our images.
We grab a stamp from the other person and stamp up a few on white or cream card stock to use at a later date.
Today for the Addicted to Stamps Challenge I used one of those images.


I had stamped up the legs on white card stock with black Staz-On.
I pulled out my alcohol inks and colored them in and added a "Happy Halloween".
Sadly I didn't ask my friend who the company was for the legs.

 I will also enter this clean card in the...
Tuesday Throwdown Challenge...Clean and Simple

Monday, August 29

I sew wanted to use a sewing machine on this one...

But since I still have 11 cards to make for Halloween for the son, I have to keep with the "Halloween" theme.


The base card is cream card stock with assorted stamps from the Inkadinkadoo "Voo Doo Doll" set stamps over the front with Staz-On timber brown ink.
Using the Tim Holtz sponge blender and Distress inks walnut stain, tea dye and black soot, I blended them all over the front.
On another piece of cream card stock I stamped the actual Voo Doo doll and cut it out.
Using the blender tool and the above inks I antiqued the doll.
I cut a piece of black #12 pearl cotton and made a cross stitch in the one eye of the doll and wrapped the thread around the leg of the doll.
I cut another piece of thread and laid it on the card for the doll to lay on. 

Getting kinda tired of Halloween at this point but need to get those other 11 cards done...

just batty...


Love this sketch.
The base card is black with the layers in grey card stock.
I trimmed up the grey layers and stamped them with black Staz-On ink using the Hero Arts bat background.
Used my Tim Holtz sponge blender with Distress ink black soot and a piece of ripped text weight paper to sponge the sky.
Punched out the two layers of grave stones using my Martha Stewart punch.
I like the dimension is adds when you place the second layer of stones a bit lower and out from the card by using glue dots.
The "Happy Halloween", also from Hero Arts, was stamped onto grey card stock and sponged with the same ink as the background.
Used a bat punch to add the idea that they are carrying the verse.

Spiders...

I really don't mind spiders...as long as they don't jump.
Most of the time I just leave them be because they provide a function, like bats.
They get rid of the things that I don't like and annoy me when I go outside.

So this card is not only for a challenge and Stephen, but in honor of the noble spider!


The base card is black with a layer of grey that I stamped using my Misti Tool (great for these big backgrounds), Hero Arts "Large Web" and Staz-On black ink.
 Before taping the grey on I added a piece of black Scrapper's Floss.
Finally I punched out the spiders and glue dotted them on to look like a banner.
 

Monday...

Time for a Mojo Monday Challenge...


This was not only a sketch but a theme as well!
I chose the 5.5" x 3.5" so it would fit in an A2 envy.
The base card is white with a layer of black card stock.
I used grey to make the strip and punched it out with the Martha Stewart cemetery stone punch.
Using the same grey I cut a piece just enough to fit behind the "Happy Halloween" ribbon I had.
(Otherwise it was lost on the black background.)

I stamped the Darice skeleton on white card stock and cut him out.
then I punched out a white ghost and started layering.
Note I have the skeleton's right hand going around and into the inside of the card.

Sunday, August 28

This one may turn some people off but...

Stephen loves his Zombies.
In fact he has a t-shirt that says 
"I don't have to outrun the Zombies, I just have to outrun you!"


This set is from Hampton Art Stamps and I'm sure you can figure it out.
Sometimes simple is better.

Tags and sequins...

are not my favorite things to work with.
I didn't say I wouldn't, I just don't like them as much as other things.

This challenge called for tags... 

I started with this...


Moved on to this...


Added this...


Tied on a ribbon and tag stamped with a verse from "Many Minis Occasions" by Taylored Expressions... 


The card is done!
 

This little girl...


This little darling reminds me so much of my granddaughter that I'm sure her Uncle will love getting this card!

I layered the patterned paper to a white base card.
The little girl from "Love is in the Air" by My Favorite Things Stamps was stamped onto white card stock with black Staz-On and colored with colored pencils.
I couldn't find the saying I wanted so decided to cut a piece of black card stock and write the saying I wanted in white gel ink.

Found another new card challenge blog...

and I really like what this one is all about.
 Cards in Envy mean they can fit in an envelope and be mailed.
I love card that don't require "extra" postage.


This card is made with the Stampin' Up "Tee-Hee-Hee" set for the verses and the images.
Except the squares which are also Stampin' Up but I only have that stamp not the complete set to be able to tell you which one it is.
All are stamped with Staz-On black.
The squares were then highlighted by using Distress marker and a watercolor brush. 

On to more cards for the Halloween guy!

Another card for the son...

If you don't usually follow me then you probably don't know why I have to make 31 cards for my son.

Stephen is really into Halloween and horror movies!
He is a 36 year old with Down Syndrome and lives in a group home.
By making so many cards I am able to fill his mailbox every day in October so he can celebrate his favorite holiday.

Now on to another card for another challenge and to fill Stephen's mailbox.


The base card is black and the layer with the sky is grey.
I ripped a piece of text weight paper and starting on the long end of one side, I sponged Distress ink faded jeans with Tim Holtz's sponge blender on the piece to be layered.
I flipped the grey piece over and applied Distress ink black soot with the ripped piece.

Then it was over to the Cuttlebug with not two but 5 dies from Spellbinders to complete the dimensional look of the graveyard.

Stephen is so going to love these.


How is it I never tried this before...

AAA cards has a great challenge this week.


Mine is...

I just love the way the Distress inks moved around the card! 
I used Distress inks black soot, faded jeans and dusty concord.
Smooshing done I dried the watercolor paper.
The image is from Stampendous and I stamped it using Staz-On black.

This will NOT be the last time I use this technique!

No cursing here...

On the blog site for Less is More they asked if we were cursing the screen for having to use stickers for this challenge.
I wasn't cursing the sticker part but the less is more because I am trying to get spooky cards done for my son.

Then I remembered my Judith ghost stamp...


Found the "Nostalgiques" by Sticko typewriter letters and there you go!


Thursday, August 25

Found another challenge I could make Halloween...


I had this set for ages and this challenge was perfect to play with it.
The set is "Pumpkin Faces Inchie Bundle" by Inkadinkadoo.
 I picked out the ones I liked and stamped them with black Staz-On on the white card stock to create the theme of the sketch.
I colored them in using colored pencils.
Starting to think I like colored pencils best for coloring!

The verse is from "All Hallow's Eve/Halloween" by Inkadinkadoo.
This was also stamped with Staz-On black.
Before foam taping the top of the card to the base card I inked up a sponge dauber with Distress ink black soot and gently rubbed it around the edges of the card and card top.

Put it all together and I have another card for my son.

These challenges are a great way to get my cards for him done.
Hopefully by mid September I will have them all finished...

Couldn't make this color challenge a Halloween card...

But I could make it a Christmas Card.


I cut the base card and added the stripes to show all four colors of the challenge.
The verse is from "GP Wildflowers" by My Favorite Things and I stamped it using Distress ink black soot.
The leaves were cut from white cards stock using "Fall Leaves" Dienamics for MFT Stamps.

The fun part was the "crinkling".
You smoosh the leaves, then open them up carefully and with the black soot and a sponge you apply ink to the edges of the leaves and the raised portions.

Add a few sequins and glitter glue to the centers and you have a soft Christmas card.
 

Hey, nobody said only the living teach...

This little doggie will attest to that...


sometimes you don't need a lot to say a lot.
The patterned paper is from a pad by DCWV called "Halloween & Fall Stack".
The stamp is from Stampin Up.
I stamped it on white card stock with black Staz-On and layered in using a square card format.
I used the square card so I could also enter the following card challenge...

I hope to get more stamping done today but if not then tomorrow's another day!

One would not think Halloween with these colors...

But as I said in a previous post, I'm on a mission, to complete 31 Halloween cards for my son!


I started with white card stock and stamped the image, Stampendous, with black Staz-On.
I then painter's taped the card to my scrap paper, all around the edge to make a "frame".
Using my Tim Holtz round blender I added Distress ink "mustard seed" two thirds of the way down the card.
Switched my foam and added "crushed olive" above nd below the mustard seed.
Finally switched the foam and added "peacock feathers" to the top!
Once it dried I  carefully removed the painter's tape and stamped the verse onto a strip of white card stock to add to the side of the card.

More to come...

Boo...

Sometimes you only need a little stamp.


This sheet of patterned paper came from a Recollection pad called "Midnight Magic"
I have this son who loves Halloween and I try to make enough cards that I can send him one every day in October. 
The "Boo" is a set called "Fall little Pics" by Art Gone Wild.
I shaded the card with Distress ink black soot and the Tim Holtz blender tool. 

More Halloween to come!

Starting today's postings with the results of my stamping with friends day...

As I said in a previous post I had my friends over to stamp for Halloween today.

One friend brought her "Penny Black Treatin' Witch" with her and I just had to play with it.
I stamped her with Staz-On black and colored her with colored pencils.
I have three darling girls that I like to stamp for at Halloween.
One is my granddaughter the others are her cousins.
I love this witch!

 
I had this set that I purchased a year ago and had never used.
Today I did and can't wait to try more with some masking...
The distress inks worked so well.
Then I stamped the verse and the faces with Staz-On black.

Okay I should have got more accomplished but remember I said we were friends...non-stop chatter!

Wednesday, August 24

You would not believe how difficult it was to get this picture...

I have an older digital camera and the setting are not conducive to the new lights.


I was finally able to get one that wasn't too fuzzy.
The base card is black card stock with a brownish grey layer on top.
The image, "Graveyard" by Stampendous, was stamped with Staz-On black to white card stock.
The "Happy Halloween" is from Impression Obsession and my favorite Happy Halloween.
Using Adirondack mushroom and slate dye inks with the Tim Holtz round blender, I took most of the white off the card.

But the best part is inside...
 This verse is by Riley and Company in their Funny Bones collection.

My hubby says I'm sick but I know the person I will be sending this to will just laugh her head off or his head off.
I may have to make two! 
 

Tuesday, August 23

Sparkling challenge...

It is very difficult to get the glitter, shimmer or sparkle to show on a card when you post it to your blog.
Last time I used glitter glue and it didn't seem to show at all.
This time I am trying embossing powder.


 I think I succeeded.
The base card is white and I made the panel by running the top through my Cuttlebug in a Darice embossing folder with Distress ink (faded jeans) on the more solid side.
The two red birds are cut from card stock using Paper Smooches "Seasonal Tree" die.
I just received an order from Simon Says Stamps with their "Falling Snow" stencil so I used that over the dry embossed image and sponged Colorbox white ink through the holes.
The embossing powder I sprinkled over the wet dots was "white jewels" by Old Town Crafts.

Hopefully this will show enough to qualify for the challenge!

Love playing with a set I "had" to have over a year ago...

and finally pulled it out to use.


The cupcake is from Tim Holtz Stampers Anonymous "blueprint assortment" and the verse from his "saying assortment".
I stamped both using  Staz-On timber brown to a cream base card.
Then I used the Prisma colored pencils to finish the cupcake.

I am happy with this card but I think the next time I will  use kraft paper for the base card.

Trying a new challenge...


I love all the blue colors in my Distress inks and decided this would be a great way to use them.
I used Versamark ink to stamp the flower from Unity Stamp Company. 
I didn't emboss it because I wanted the faded look to the flower.
Used my Tim Holtz sponge daubers to apply Distress inks (stormy sky, faded jeans and chipped sapphire).
The finish was to negative die cut the hello with Impression Obsession DIE174-W.


This year the lightening bugs have been amazing...

due to the thing I hate the most...hot nights.
But I love looking at these beautiful, twinkle lights in my pine trees on a summer night from the window of my air conditioned living room.

This all lead to the card for the Mojo Monday Challenge.


The base card is a nice, heavy duty 12"x12" from a Debbie Mumm paper pack.
The others came from my stash of scrap paper.
The little lightening bugs came from a recollections set.
I stamped the bugs and jar, using Staz-On timber brown and colored them with colored pencil.
The one little bug that looks like he is trying to escape was achieved by masking the top before stamping the bug.

I've been using a lot of my glue dots but lucky for me they are easy to make again with a DVD case and my bottle of
 "Aleene's Tack it over and over".

Sometimes you just don't have the right stamp...

But you do have the right paper pack...


and the right sheet...


and scissors, paper trimmer and die cut...


and the right foam and glue dots...


to make the right card for the challenge!


I have friends coming over...

This week and we are going to make Halloween cards.


Sometimes you only need a few things to make a fun card.

Black card stock cut long... 


a fun background paper...

a small punch from the dollar store...


and ink with a circular sponge 
(in this case the Tim Holtz sponge dauber)...


I did have some glue to add the ghosties.
But this is so nice to remember that you can create without having to own every thing in the world of stamping.
(Though it is nice to have "stuff")

Saturday, August 20

I have a friend who LOVES florals...

and is so much better at them than I but I still try.


I found this patterned paper in my stash and that started the theme.
I used a piece of plastic to rub Distress in on, then spritzed and layed the paper over it.
Once it was dried I added the stamped image from a Stampin Up set and the green pearls for accent.


This is my idea of exotic...


I collect this little dollies and am so glad I have.
When my granddaughter wakes from her nap in our bedroom it's the first thing she points to.

The company no longer exists that I purchased this set from but I am so lucky to have found them before they went OOB.

I stamped my doll in Staz-On black and colored her using Distress markers.
The verse is also stamped with Staz-On black.
 

A day at the beach...

I may get in trouble for this one, if so I apologize.
I really wanted to join this challenge and when I came up with the following card I realized I had used a Darice embossing folder.
Impression Obsession says to use ONLY their stamps and dies but this isn't either???


I started with the Darice folder and smeared Distress ink on the flatter side before running through my Cuttlebug.
Once it was dry I used a brown crayon without the paper on it to lightly touch the cattails.
The die is cut from the center of the brown layer.
It is "Greeting Set" DIE174-W from Impression Obsession.

You may think..."Why is this a day at the beach?".
When I go to the beach it's usually to walk near Lake Ontario, not far from me, and I end up looking down at the beach through the cattails! 

If for any reason, Jeanne, this doesn't fit the criteria it would not bother me at all if you take it down. 

Anything Goes...again...

Found another challenge that will use my cards from yesterdays Autumn marathon card making session.

 
The leaves I used for this card were, again, cut from Spellbinders packaging to make the stencils.
This time I used the thick Sizzix dies.
Please note if you decide to do this, I only used the thick heavy dies or punches. I don't want to "dull" my thinner dies.
I placed the inside of the large leaf stencil on the card stock and using Distress inks and sponge daubers I pulled the color from the leaf to the edge of the card.
Then I used the smaller leaves to place colored leaves around the large "empty" leaf.

 The verse is from an Inky Antics set for Autumn.
I used Staz-On timber brown for the verse.

Anything goes...

Don't you love these challenges?
You can do whatever you want!


I have a friend who needs autumn cards to send out to the shut-ins from her church.
I LOVE AUTUMN...
so I spent all day yesterday making cards for her.

The one above was simply done.
I used the plastic from the Spellbinder packaging, never throw anything away, to cut a leaf stencil with a Marvy punch I have.
 Using my Distress inks and my sponge daubers I made multi-colored leaves.
The verse, from "Autumn Harvest" TPC stamps, is inked with Distress ink.
I trimmed the inked piece to layer onto the same color card stock for my base card.

Such fun...can't wait for Autumn.